Step 2: Select the 'Cap 1' object in the objects manager then click the Edge mode tool and go to Selection > Select all
Part 1. on the edge of the object
You will need the AixSponza's (free) SplineOnSpline plugin to do this.This is useful to accomplish growth effects with C4Ds built in generators.
Step 9: Now hit play and this is the result...
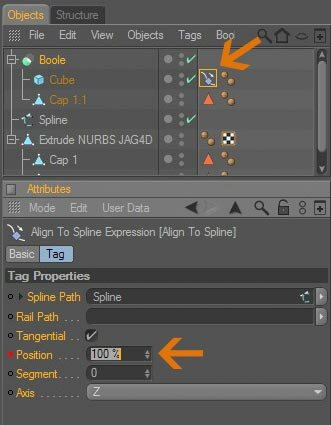
Step 8: Now, time to start the animation, drag the animation bar to the right until it ends on 3s then press the Automatic Key framing button. Select the Align to Spline tag, change the settings of the position field to 100% then press the Automatic Key framing button to stop the animation
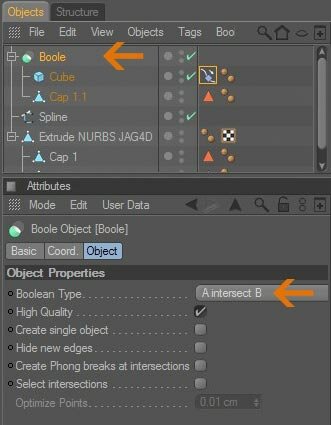
Step 6: Now select the Cube object and the 'Cap 1.1' object then dropped them under a Boolean object (A intersect B) like the image below:
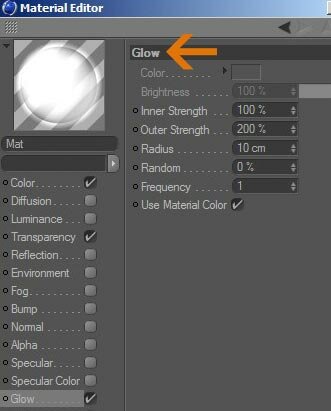
Step 7: Add a new material then apply it to the Boole object as the following:

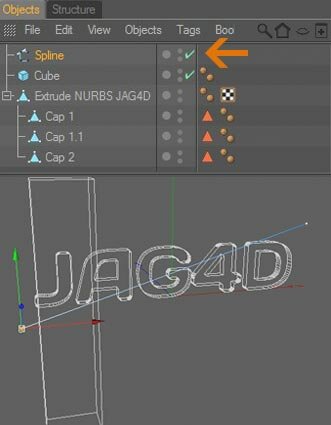
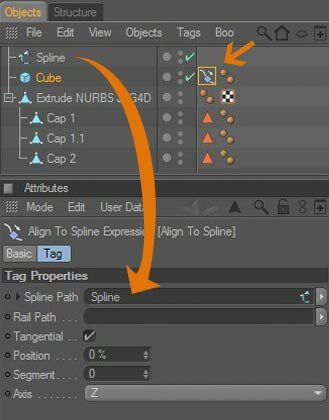
Step 5: Now select the Cube object in objects manager and add Align to Spline tag, drag and drop your spline into spline path field in atrribute manager and let the Cube object follow a spline.

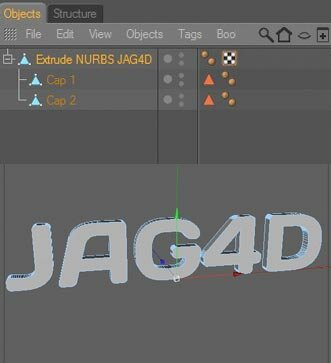
Step 1: Add the text object (make it editable)
Step 2: Select the 'Cap 1' object in the objects manager then make a duplicate of the 'Cap 1' object, either Edit > copy > paste or Ctrl-Drag in the Objects Manager. Name it Cap 1.1
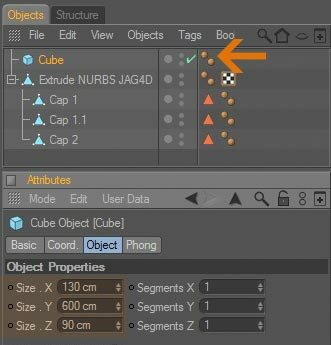
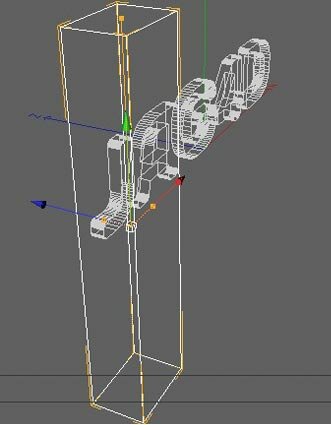
Step 3: Now create a Cube object and change the settings to the image below:
Step 8: Now hit play and this is the result...
Step 4: Now add the splineonspline plugin and make the 'cap1 spline' a child of the splineonspline in objects manager
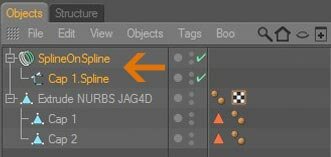
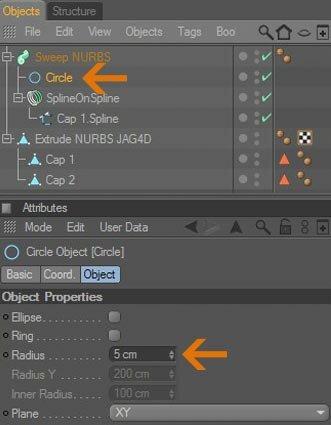
Step 5: Edge sweep a circle to that 'splineonspline' and change the settings to the image below:
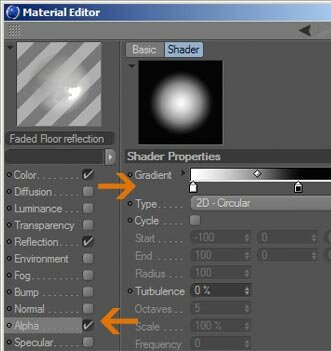
Step 6: Add a new material then apply it to the Sweep Nurbs object as the following:
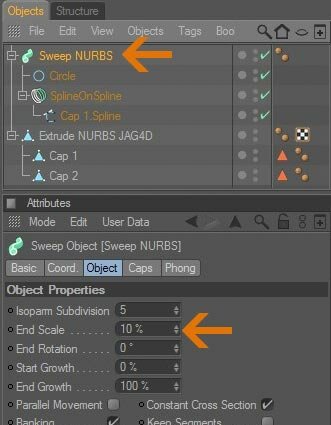
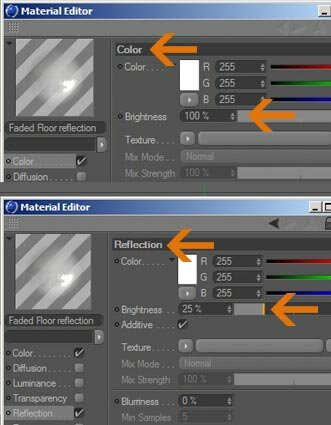
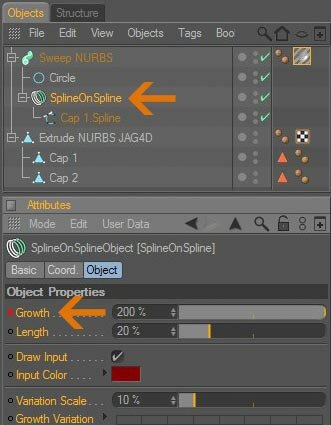
Step 7: Now click the splineonspline in the objects manager then animate Growth option in the attribute manager, go to 0s set the position in the Growth option to 0 then right click and select Animation > Add Keyframe. Now go to 3s and set the Growth option to 200% then right click and add another keyframe.
Step 3: Then convert that edge seam to a spline (Structure > Edit spline > Edge to spline), If you click the little plus sign (+) to the left of the 'cap1' name you will get the 'cap1 spline' object
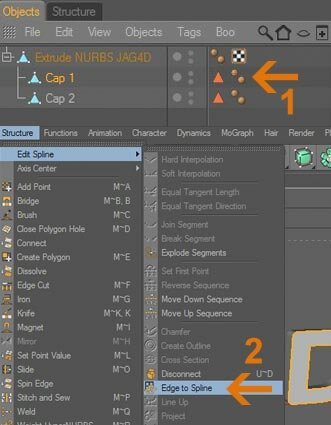
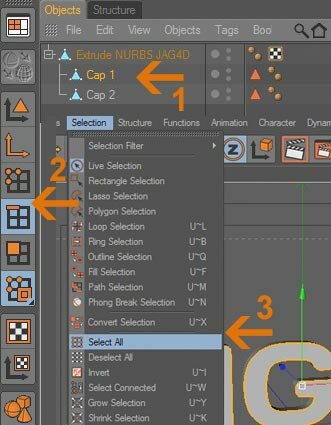
Step 1: Add the text object (make it editable)
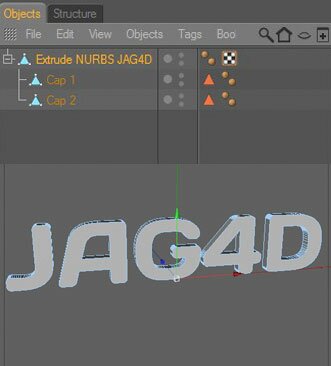
This tutorial shows how to fake an animated shine effect in cinema 4d
[C4D] Animated Shine Effect


Cinema 4D Modeling and Animation
Support for JAG4D
Tips n Technique 2
table of contens
table of contens
Part 1. on the edge of the object.
Part 2. on the surface of the object.
Part 2. on the surface of the object.
Part 2. on the surface of the object.
Step 4: Create a spline object like the image below:
