Final result ( swf format )
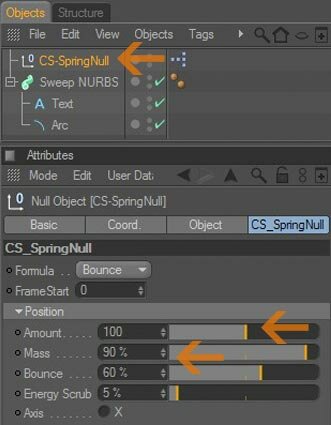
Step 7: Now select the SpringNull object in the object manager then in attributes manager>CS_SpringNull tab set the Amount to 100, set the Mass to 90% and and set the Bounce to 60% (Put the mass high and the bounce high and it will go surprisingly slow and smooth)
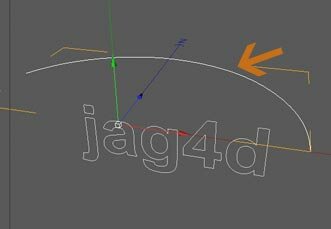
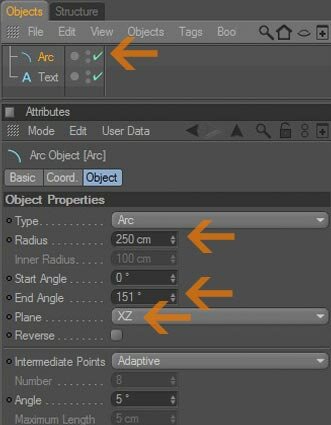
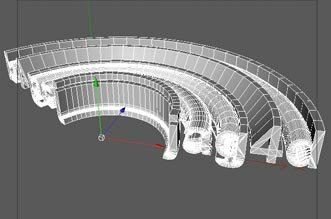
Step 2: Create the spline you want to grow along
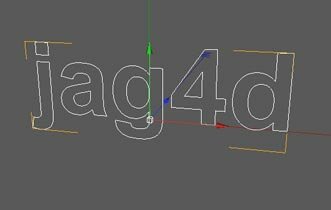
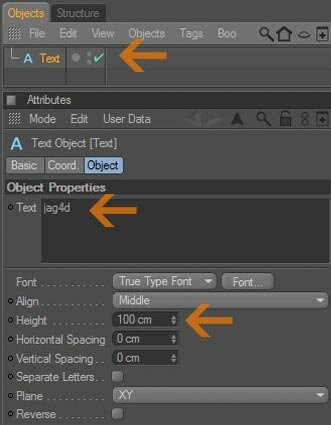
Step 1: Create a text spline
This tutorial shows how to adding bounce an extrusion in the Sweep Nurbs using the CSTools SpringNull.
[C4D] Bounce in Sweep Nurbs


Cinema 4D Modeling and Animation


Support for JAG4D

Tips n Technique 2
table of contens
table of contens


Get CSTools for C4D by C.Smith
(CSTools is now part of the Broadcast Extension kit with C4D 11.5)
(CSTools is now part of the Broadcast Extension kit with C4D 11.5)
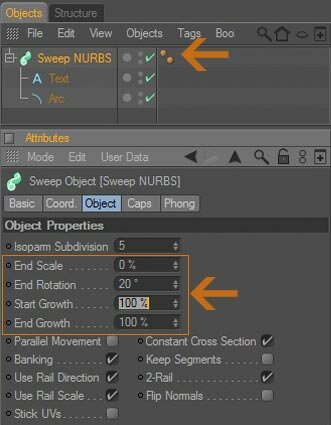
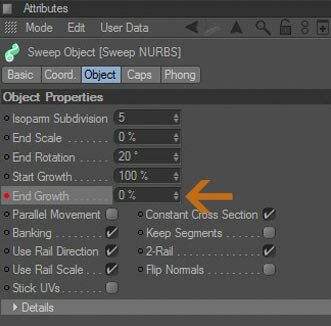
Step 4: Select the Sweep Nurbs in the object manager then in the attributes manager (object tab) : set the End Scale to 0% ,set the End Rotation to 20 and set the Start Growth to 100%
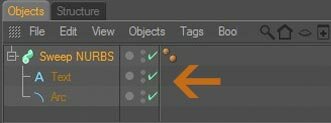
Step 3: Add the Sweep NURBS object then place the text and the Spline as children of the Sweep NURBS (The top child will be the text and the second child will be the path (the spline))
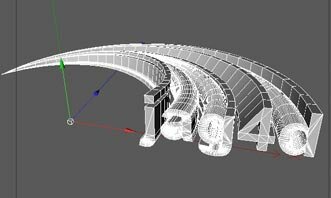
Step 5: Now go to 0s set the End Growth in the Object tab (The sweep NURBS object) to 100 then right click and select Animation > Add Keyframe. Now go to 3s and set the posiiton to 0% then right click and add another keyframe.
Add springiness to the animation:
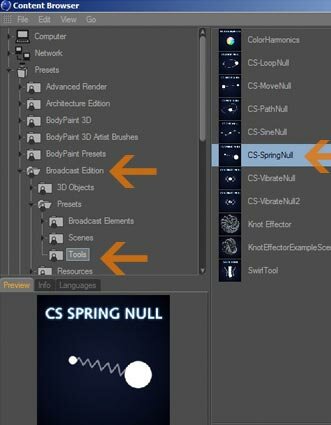
Step 6: Add a CSTools SpringNull to your scene, hit the Content Browser, in the Broadcast Edition > Presets > Tools > select the CS-Spring Null
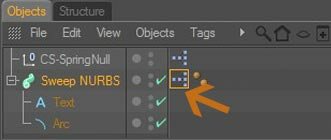
Step 8: Put a XPresso Tag (Cinema 4D Tags>XPresso) on the Sweep NURBS then open the editor by double clicking the XPresso tag
a. Create a Range Mapper node (right click in Xpresso editor>New Node>XPresso>Calculate> Range Mapper)
b. Drag the SpringNull Object into the editor, add Global Position Y output to SpringNull Object node (click on the red rectangle>select Coordinates>Global Position>Global Position Y)
c. Drag the Sweep NURBS Object into the editor, add End Growth inputs to the Sweep NURBS Object node (click on the blue rectangle>select object properties>End Growth)
Now Connect them all, and here's the Screenshot of the whole setup.
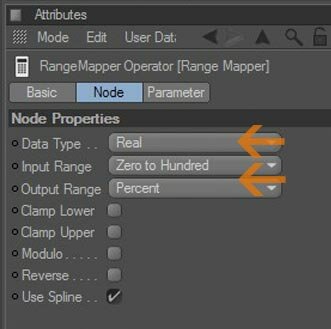
Step 9: Select the Range Mapper node then in the 'Node' tab set : Data Type: Real, Input Range: Zero to Hundred, Output Range: Percent. Uncheck all other options (Clamp Lower, Clamp Upper, Modulo, Reverse).

Step 10: Hit play...enjoy
