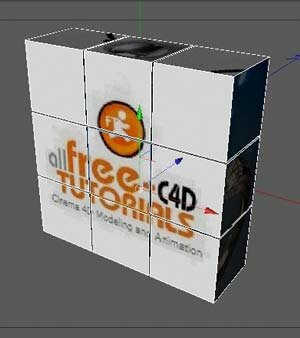
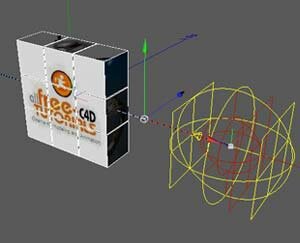
Now hit play and this is the result...
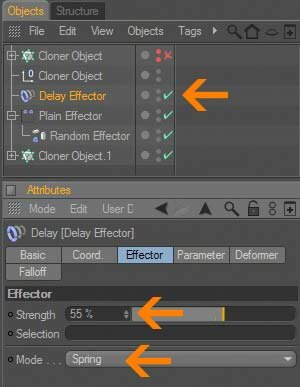
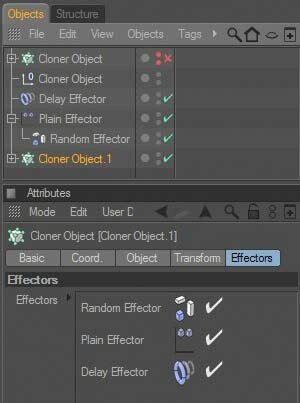
Delay Effector (Effector tab)
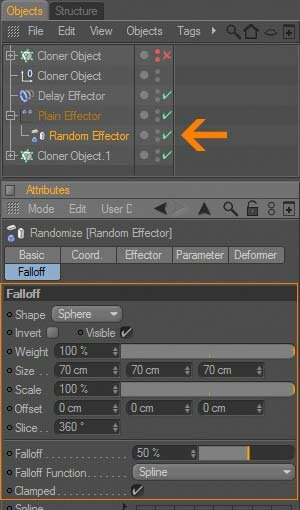
Random Effector (Falloff tab)
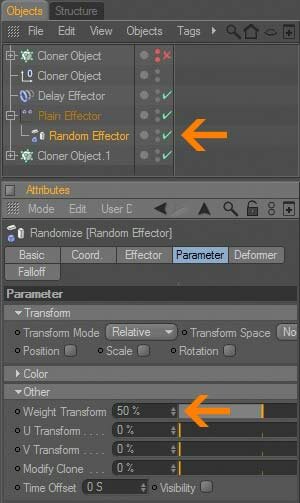
Random Effector (Parameter tab)
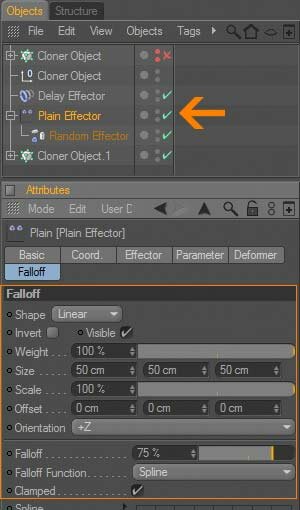
Plain Effector (Falloff tab)
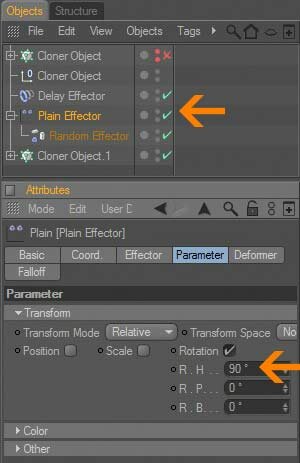
Plain Effector (Parameter tab)
Now adjust the Effector settings, see images below
• If you did not select the cloner object before adding the effectors,
you will have to drag it in the "Effectors Tab" field by hand
you will have to drag it in the "Effectors Tab" field by hand
Tips :
B. Animate the cube
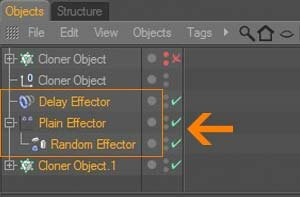
Step 10: Now, time to start the animation, select the cloner object in the object manager then add a Plain Effector with a Random Effector (using a falloff) effecting the 'weight' of the Plain Effector. To get a rebound effect from the clones add a delay effector (with spring mode).
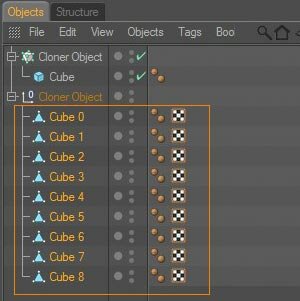
Step 8: Select all cubes and center the axis to parent (Structure > Axis Center > Center To Parent).
All cubes will now be centered, occupying the same spot.
All cubes will now be centered, occupying the same spot.
Note :
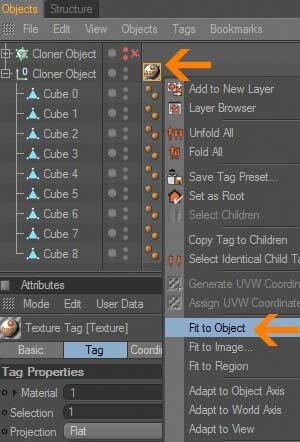
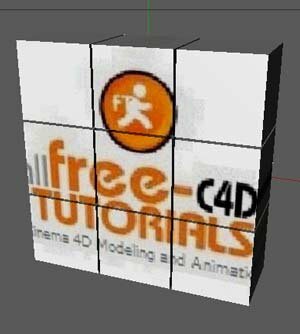
After fitting texture to object, you will not see the texture until you apply tag to child. Then you can see it.
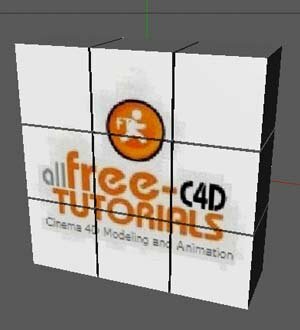
After mapping the images on all sides of the cubes, then follow the steps below.

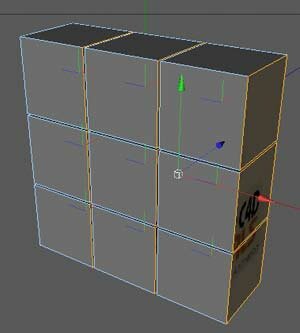
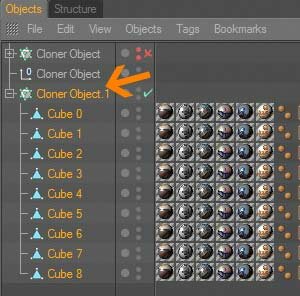
Step 9: Now move them to a new Cloner object using the same settings as when creating the wall at start.
Step 7: Repeat steps 3 through 6 for all five sides (follow the steps above).
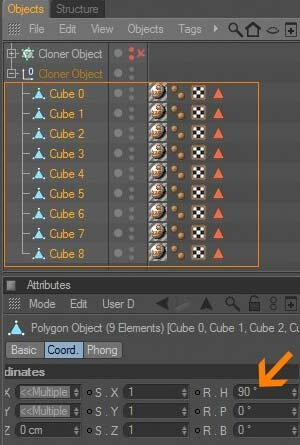
Step 6: Select all the cubes and rotated by 90 degrees in the attributes manager.
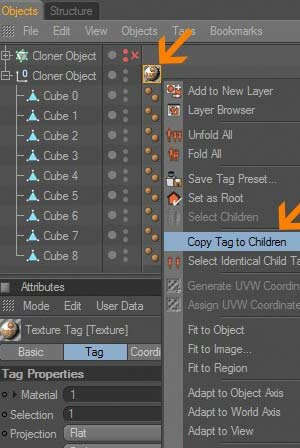
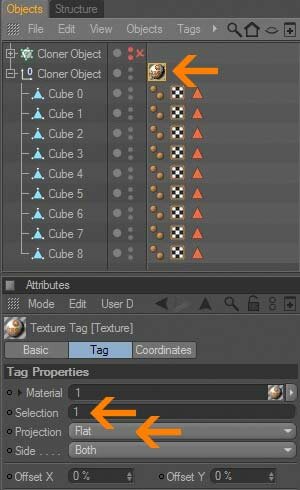
Step 5: Adjust the texture (select the texture tag and then right click your mouse button, scroll down then select "Fit to Object") then RightClick the texture tag again and "Copy Tag to Children".
After that remove the Parent texture tag.
After that remove the Parent texture tag.
Step 4: Now apply the first material with Flat Projection on the parent Null set to first selection (1 i.e.).
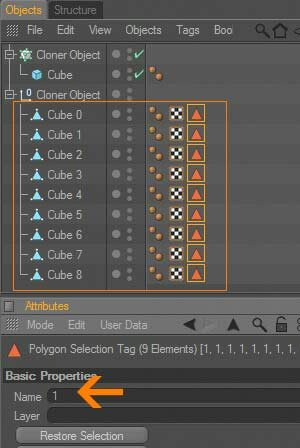

Step 2: Select the Cloner object then convert the cubes to real geometry (Current State to Object command (under the Functions menu))
Step 3: Switch to the Polygon Tool then select all cubes from the object manager. Make sure you are on the selection tool and not the move tool. Now set selection (Selection > Set Selection) for the front face polygons, name it the polygon selection tag "1" (Same for all)
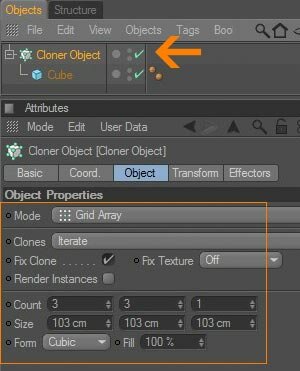
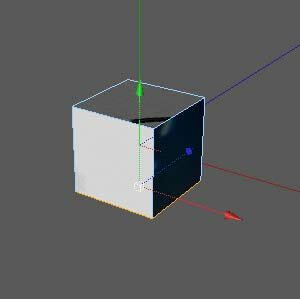
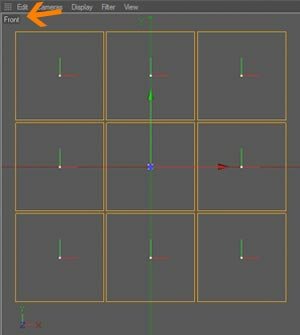
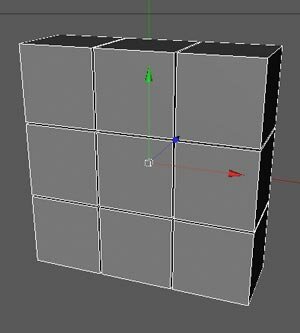
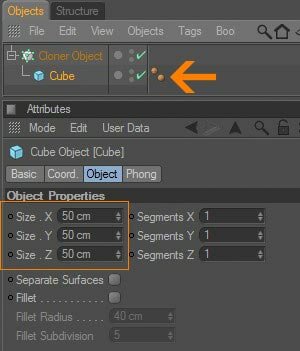
Step 1: Create the wall with a cube object under a Cloner object then edit setting parameter like follow
The tips by Lennart (TcaStudios).
Lennart,Thanks for a great solution!
to describe these tips follow the instructions below
Lennart,Thanks for a great solution!
to describe these tips follow the instructions below
A. Mapping a single image onto cube faces, so it covers all of the separate cubes.
This tutorial shows how to create a flipping effect on the cubes to reveal different material on each side of the cubes using MoGraph.
[Mograph] Cubes Flip Effect


Cinema 4D Modeling and Animation


Support for JAG4D

Tips n Technique 2
table of contens
table of contens